REVIEW · NEW YORK CITY
New York Icon Photography Tour led by a Local Photographer
Book on Viator →Operated by New York City Photo Safari · Bookable on Viator
Great photos start with the right teacher. This 2.5-hour New York Icon Photography Tour pairs iconic landmarks with hands-on guidance from local professional photographers who know exactly where to stand. You’ll get a mix of classic Midtown sights and Central Park scenery, with a path built for learning as you go.
I especially like the local, working photographers running the show, plus the small-group limit (max 8) that keeps the coaching personal. You’re not stuck watching from the back of a tour bus.
One consideration: this is a moderate walking experience through dense areas of Manhattan and parts of Central Park, so comfy shoes matter.
In This Review
- Key highlights worth your time
- The pitch: iconic NYC photos with local pros, not generic touring
- Price and logistics for a $125 photo safari
- How you’ll actually improve while walking (framing, angles, and real corrections)
- Stop-by-stop: Rockefeller Center, Radio City, and the Midtown lesson plan
- A quick pause at the Photo Safari stop
- Manhattan skyline, ATLAS, and the art of making towers look 3D
- Fifth Avenue pop culture and luxury: Saks, LEGO, Apple, and the window-world
- The Plaza and The Pierre: classic New York, shot with intent
- Trump Tower and the street-level power of bold facades
- Central Park Zoo, Gar Pond, and Gapstow Bridge: practice water + reflections
- Top of the Rock, MoMA, and the final push for standout frames
- Who this tour suits best
- What to bring so you get your money’s worth
- Should you book this tour or not?
- FAQ
- How long is the New York Icon Photography Tour?
- Where does the tour meet?
- Where does the tour end?
- What is included in the price?
- Is hotel pickup included?
- What’s the group size?
- Can children join?
Key highlights worth your time
- A local pro guide who coaches your photography, not just your sightseeing
- Max 8 people, so you get corrections and suggestions in the moment
- Two route styles, morning or afternoon, so light and crowds are different
- Subway fare included, which keeps you from paying extra just to connect neighborhoods
- A stop-by-stop mix of architecture, storefronts, and park water, built for variety in your shots
The pitch: iconic NYC photos with local pros, not generic touring
This tour works because it treats photography as the main event. Yes, you’ll hit New York’s best-known landmarks. But the real value is that your guide is a local professional photographer, not a standard sightseeing guide with a camera app.
Expect coaching that’s practical and sometimes very technical. In reviews, guides like Zim and Rob get praised for being patient, funny, and direct—giving you time to practice while also pushing you when your framing or focus is off. That balance matters. You’ll learn faster because you’re shooting the scene, not just listening to tips.
You can also read our reviews of more photography tours in New York City


Price and logistics for a $125 photo safari
![]()
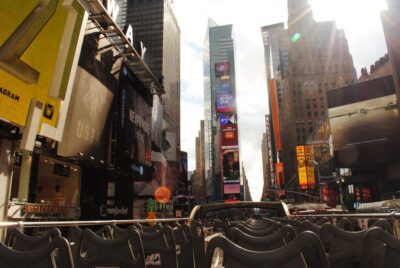
At $125 per person for about 2 hours 30 minutes, this sits in the “small-group coaching” category, not a basic walking tour price. The good news is that what’s included helps that math. You get a professional local photographer guide, plus subway fare and local taxes.
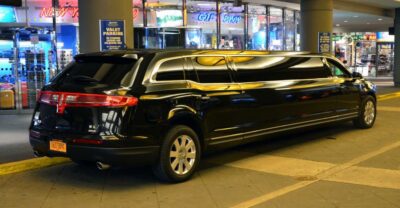
What you should plan for: no hotel pickup/drop-off. You’ll start and end at 180 Madison Ave. Also, since it’s a route that moves between Midtown and Central Park, you’re counting on public transit and walking. That’s part of the point—getting you to multiple iconic setups without spending your whole day trapped in taxis.
If you like structure and clear targets, the price feels fair. If you already know your camera like a pro and only want sightseeing, you might question it. But if you want better photos you can actually recreate later, the coaching is the payoff.
How you’ll actually improve while walking (framing, angles, and real corrections)
![]()
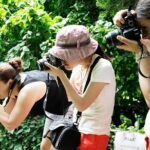
This isn’t just a list of places to photograph. Your guide helps you see the city with photo-brain turned on.
From the reviews, the most repeated themes are:
- Better composition (how to frame buildings and street scenes)
- Smarter angles (standing places that change the story)
- Learning to use your camera more effectively
- Getting enough time to practice so your photos improve instead of staying random
One reviewer specifically called out Lightroom help, which tells you these guides don’t only focus on shooting—they often talk about editing workflows too. Even if you don’t use Lightroom, you’ll still benefit from the “make this look like the photo you imagined” mindset.
Also, because the group is capped at 8, corrections land faster. You’re more likely to get individualized notes like adjust your angle, change your framing, or wait for the light/crowd pattern for a cleaner shot.
Stop-by-stop: Rockefeller Center, Radio City, and the Midtown lesson plan
Your route begins at Rockefeller Center, where geometry and scale do most of the work for you. You’ll have plenty to work with: dramatic facades, strong lines, and classic “New York postcard” compositions. The coaching here is about taking a famous subject and making it look intentional—no one-click tourist photo.
Next comes Radio City Music Hall, a spot made for bold, symmetrical framing. It’s also a place where the crowd rhythm matters. You’ll learn to use timing and positioning so your image doesn’t feel crowded or messy.
Then you pass St. Patrick’s Cathedral, which is all about vertical drama and detail. This is where you’ll get coached on how to capture grandeur without your image turning into a blurry mess of stone. Expect guidance that helps you simplify the scene into what matters.
Stop 4 through Stop 6 set up a pattern: wide icon shots first, then progressively more refined compositions. It’s a nice way to level up without getting overwhelmed.
A quick pause at the Photo Safari stop
You’ll also hit a stop labeled New York City Photo Safari. In practice, this kind of pause is where your guide can reset the group and give you a tighter plan for the next stretch—what to focus on, what to ignore, and how to approach the next iconic subject.


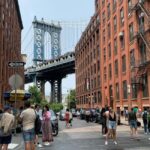
Manhattan skyline, ATLAS, and the art of making towers look 3D
Once you shift toward Manhattan Skyline, your guide’s job becomes “make the view look like a photo, not a screenshot.” This is where angle and perspective coaching really shows up. Even with the same skyline, two people can produce totally different images depending on their position and framing choices.
After that, you’ll encounter ATLAS, which is the kind of landmark people recognize quickly. It’s also the kind of subject that rewards looking for the lines and edges—how parts of the structure relate to each other, and how to keep the shot clean.
This stretch is good for anyone who has ever taken a city view photo and thought: I got the place, but it doesn’t feel like it.
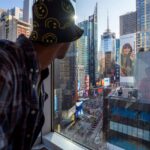
Fifth Avenue pop culture and luxury: Saks, LEGO, Apple, and the window-world
Now you get the fun part: Saks Fifth Avenue, the LEGO Store, and Apple Fifth Avenue. These stops are excellent for learning how to photograph storefront energy without getting lost in it.
- At Saks Fifth Avenue, the focus is usually on scale and detail—how the building and surrounding street elements create a frame.
- The LEGO Store adds color and playful shapes, which can help you practice composition when the “correct” image isn’t only about architecture.
- Apple Fifth Avenue often creates strong reflective and clean-looking surfaces. It’s a great checkpoint for what you’ve learned about angles and control.
After that, you’ll visit Pulitzer Fountain. This is a reminder that iconic photos aren’t always about huge skylines—water, people movement, and stone surroundings can make for a strong, story-like frame if you time it right.
The Plaza and The Pierre: classic New York, shot with intent
Next is The Plaza, plus The Pierre, A Taj Hotel, New York. These stops are perfect for teaching you the “New York mood” of elegance and old-world formality.
Here’s what makes them rewarding:
- You can build a strong shot using symmetry and leading lines.
- You can look for moments where the architecture frames the street rather than competing with it.
- Your guide can show how to keep the shot from becoming a generic wide facade photo.
Then you’ll move through Grand Army Plaza, which brings you back to larger-scale public space. Think of it as a bridge between Midtown grandeur and the more nature-filled parts of the route ahead.
Trump Tower and the street-level power of bold facades
![]()
At Trump Tower, you’ll see how guides translate “big name landmark” into better images. The coaching here tends to focus on how to shoot a shiny, attention-grabbing building without overcomplicating the scene.
From a photo standpoint, this is a useful checkpoint:
- Does your frame feel deliberate?
- Are you capturing the building as the subject, or letting the background steal attention?
- Can you simplify the shot into something clean and repeatable?
It’s also a good reset before you head into Central Park.
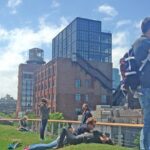
Central Park Zoo, Gar Pond, and Gapstow Bridge: practice water + reflections
The route heads into Central Park Zoo, then continues to Gar Pond, and later Gapstow Bridge. These stops change the rhythm. Now you’re not chasing hard edges and storefront detail—you’re working with park pathways, water, and classic views.
This is where reflections and softer light matter. Even if your camera settings are already decent, water scenes can expose composition issues fast:
- Your horizon line matters.
- Angles change everything.
- The background can either calm the image or clutter it.
Gar Pond is especially helpful for practicing how to compose with water as a secondary subject, not just a background blur. Then Gapstow Bridge brings you back to structure. It’s a classic “put the bridge in the frame and use the surrounding banks” kind of shot.
This segment is ideal if you want your souvenir photos to feel like you did more than just stand in front of a famous building.
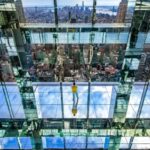
Top of the Rock, MoMA, and the final push for standout frames
After the park stops, you return to iconic city sightlines with Top of the Rock. This is the kind of location where your guide can help you make the view look more cinematic by tightening framing and controlling distracting elements around the edges.
Then you head to The Museum of Modern Art (MoMA). Museums can be tricky for photos if you shoot like it’s just another building. Your guide’s job is to show you what to emphasize—often the clean lines, entrances, and the way the environment can frame your shot.
Finally, you finish with more high-style storefront icons:
- Bergdorf Goodman for elegant facade details and window-display energy
- Tiffany & Co. for signature color and refined street-level compositions
These last stops are where the coaching “clicks” for many people. By then, you’ve had multiple chances to practice framing, angle choice, and keeping your subject clear.
Who this tour suits best
I think this is a strong match for:
- You want better photos but you also want to learn how to get them, not just where to stand
- You’re traveling with a partner or family and want a shared activity that also upgrades your results
- You visit NYC for the classics and you’re tired of bland pictures you could have taken anywhere
It also works well if you’re not a total beginner. Reviews mention coaches helping both experienced and less experienced photographers, with patient instruction and corrections that don’t talk down to you.
If your goal is purely “see as many landmarks as possible with minimal effort,” you might prefer a bus tour. This is more active. But the tradeoff is you leave with images that feel like you learned something.
What to bring so you get your money’s worth
You’ll get the best results if you come ready to shoot during walk-time, not only at the big photo stops. Bring:
- Your camera gear (or your phone if that’s your tool) and any charger/batteries you rely on
- A way to keep notes if you like remembering composition tips
- Comfortable shoes for Midtown sidewalks and park paths
Also, decide in advance what kind of pictures you want: clean architectural lines, reflections, street-level fashion energy, or skyline views. Your guide can’t read your mind, but they can steer you faster when you have a goal.
Should you book this tour or not?
Book it if you want photos that look intentional and you’re happy to learn while walking between iconic NYC settings. The value is strongest when you care about the photography coaching—guides like Zim and Rob get praised for patient, personalized teaching and for pushing students to improve.
Skip it only if you don’t care about learning and you’d rather spend your time passively sightseeing. At $125, this is priced for the coaching experience, not just the landmark list.
If you’re on the fence, check your travel style: if you enjoy hands-on experiences and you like coming home with better images than you started with, this is an easy yes.
FAQ
How long is the New York Icon Photography Tour?
It runs for about 2 hours 30 minutes.
Where does the tour meet?
The tour meets at 180 Madison Ave, New York, NY 10016, USA.
Where does the tour end?
The tour ends back at the same meeting point.
What is included in the price?
The price includes a professional local photographer guide, subway fare, and local taxes.
Is hotel pickup included?
No, hotel pickup and drop-off are not included.
What’s the group size?
The tour has a maximum of 8 travelers.
Can children join?
Children must be accompanied by an adult.