REVIEW · NEW YORK CITY
Central Park Photography Tour with Local Photographer
Book on Viator →Operated by New York City Photo Safari · Bookable on Viator
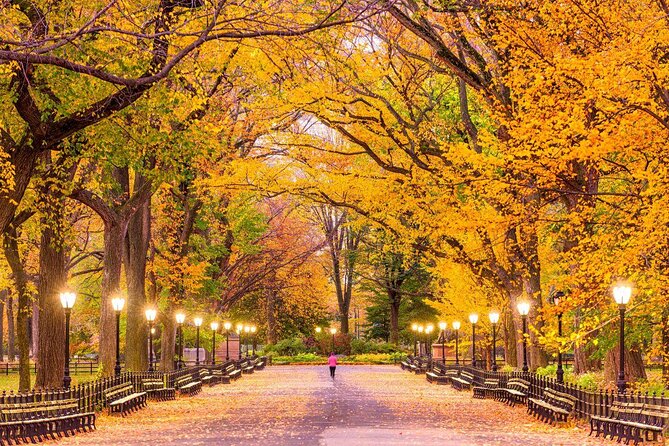
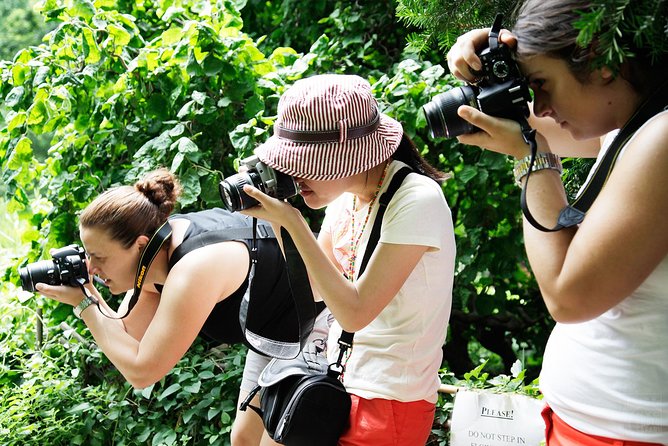
Central Park is a photo course in disguise. This 2.5-hour small-group workshop with a local photographer strings together well-known Central Park sights into a guided shoot, starting at Bethesda Terrace.
I like that the stops are picked for real photo potential, and that you get practical instruction as you go.
I also like the workshop vibe. It’s built to help you use your own camera (or phone with camera controls), with tips that match your level. With a maximum group size of 8, you’re not stuck watching other people take pictures.
One drawback to plan around: there’s no hotel pickup or drop-off, so you’ll need to get to Bethesda Terrace and back on your own.
In This Review
- Key Points That Make This Tour Worth It
- Getting Started at Bethesda Terrace (and Why It Matters)
- A Workshop, Not a Sightseeing March
- Stop 1: Shakespeare Garden Seasonality and What to Shoot
- Stop 2: Bethesda Fountain for Scale, Symmetry, and Mood
- Stop 3: Bethesda Terrace for Texture and Architectural Details
- Stop 4: Swedish Cottage Marionette Theatre for Storybook Character
- Stop 5: Naumburg Bandshell for Stage-Like Framing
- Stop 6: Central Park as a Practice Loop
- Stop 7 and 8: The Met and the American Museum of Natural History as Photo Backdrops
- Price and Value: What $100 Buys You in Real Skills
- Practical Tips So Your Photos Look Like You Tried
- Who Should Book This Central Park Photography Workshop
- Should You Book It?
- FAQ
- Where is the meeting point for the Central Park Photography Tour?
- How long is the tour?
- What’s the group size limit?
- Do I need my own camera?
- Is hotel pickup included?
- What if I’m traveling with children or need service animals?
- Can I cancel for a full refund?
Key Points That Make This Tour Worth It
- A true photo workshop: you get hands-on guidance, not just a walk with landmarks
- Local photographer leadership: an NYC-savvy professional who knows where the light and angles usually land
- Small group, max 8: enough time for your questions and more individual attention
- Signature Central Park photo stops: Shakespeare Garden, Bethesda Fountain, Bethesda Terrace, and more
- Great framing variety: dramatic fountains, terraces, storybook architecture, bandshell views
- Museums on the edges: you’ll work with photo backdrops near the Met and the American Museum of Natural History
Getting Started at Bethesda Terrace (and Why It Matters)
Bethesda Terrace is a smart place to begin because it gives you immediate structure. It’s not just “a pretty spot.” It’s a visual hub where you can understand what your camera can do with distance, scale, and detail all at once.
From there, the tour moves as a sequence of shooting opportunities. That matters because photography improves faster when you practice in context. Instead of learning theory and hoping it shows up later, you learn a technique and then test it within minutes.
You’ll meet at Bethesda Terrace (address: Bethesda Terrace, New York, NY 10024). The tour ends back at the meeting point, so you’re not tracking your own way through the entire park after the workshop portion.
You can also read our reviews of more photography tours in New York City


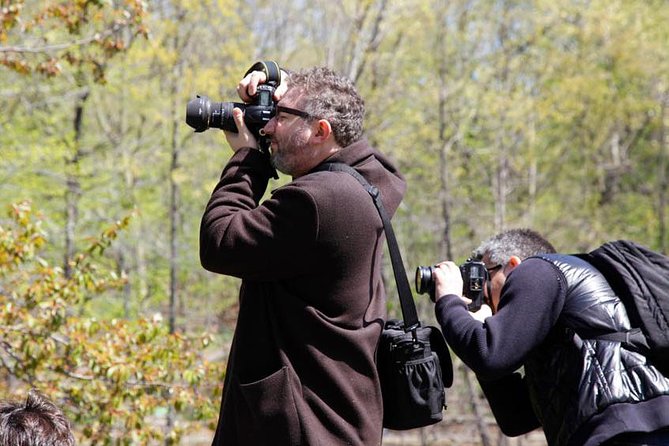
A Workshop, Not a Sightseeing March
The big thing I like here is the ratio: talking time is geared toward helping you take better photos right away. The session is designed around instruction—how to use your camera features and how to think like a photographer before you press the shutter.
If you’re new, that’s especially helpful. You’re not expected to already know what aperture, shutter speed, or focus settings mean. You’ll get practical coaching, and because the group is small, you’re more likely to get answers that match what you’re doing on your own device.
If you’re more advanced, this format can still work well. You can use the stops as “practice scenarios.” For example, you can focus on:
- timing your shots for moving subjects or changing light
- finding strong composition lines in busy park scenes
- tightening up focus for details like stonework or small architectural elements
One review highlighted that a 15-year-old got lots of instruction and individual time, and that the guide pushed the student to think about turning the hobby into something more serious. That’s the vibe you’re hoping for: coaching that treats your camera skills as something you can build, not just something you either have or don’t.
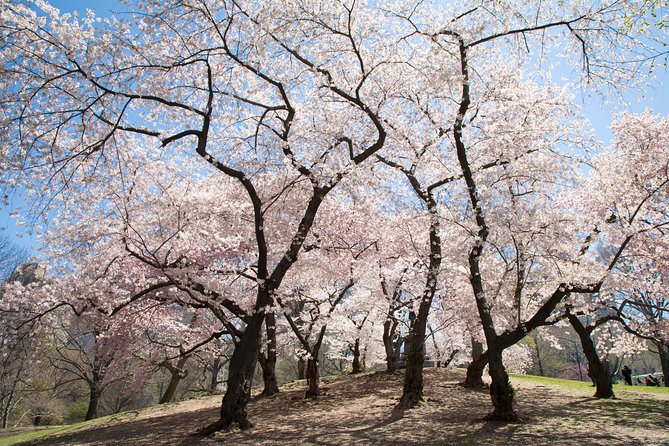
Stop 1: Shakespeare Garden Seasonality and What to Shoot
Shakespeare Garden is one of those Central Park areas people associate with romance and storybook angles. But it’s also a practical subject for photographers because it encourages close-to-midrange composition.
Here’s the key detail to know: Shakespeare Garden is included in spring and summer safaris. If you’re traveling outside those months, you’ll still get a well-paced route, but this specific garden stop may not be part of your session.
What I’d focus on when you’re there:
- leading lines toward statues or paths
- layered depth (foreground leaves, mid paths, background structure)
- light and shadow across planting beds and stone edging
It’s also a great stop for learning how to handle color. Gardens can look great in person, but photos can come out flat if you don’t pay attention to contrast and exposure. A local photographer will push you to look for the “clean” frames, not just the busiest ones.
Stop 2: Bethesda Fountain for Scale, Symmetry, and Mood
Bethesda Fountain is one of the most photographed spots in Central Park for a reason. The composition is strong, the details are photogenic, and the subject creates natural “center point” framing options.
This is where your guide’s techniques really help. If you simply shoot from wherever you stand, you can end up with the fountain looking smaller or cluttered by surrounding elements. During a workshop, you’ll be guided toward angles that make the fountain feel monumental.
Two practical goals here:
- Use symmetry or near-symmetry to create order in your photo
- Decide if you want full scene context (wider shot) or detail mood (closer elements)
Also, because this is an active park area, people will move through your frame. That gives you a chance to practice timing: wait for a clear moment, then shoot. Even if you’re using a phone, small shifts in timing can make the difference between a good image and a great one.
Stop 3: Bethesda Terrace for Texture and Architectural Details
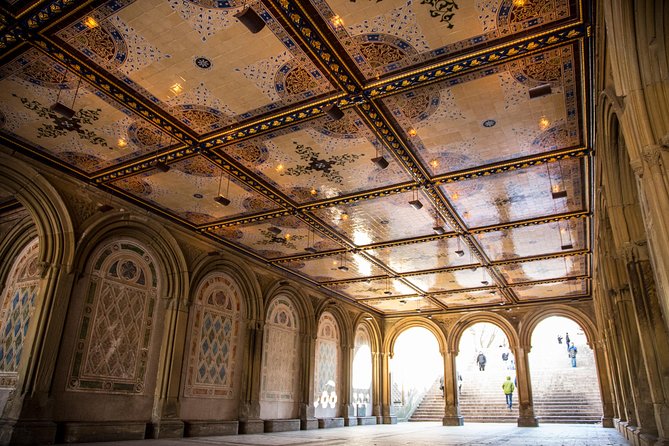
Bethesda Terrace is the next step up from the fountain. If the fountain is about the big idea, the terrace is where you learn to see the small stuff.
This area is excellent for photographing:
- stone textures and carved details
- repeating architectural patterns
- dramatic terraces and the way the structure frames the view
If you’ve ever taken a picture of ornate stonework and felt disappointed because it looked dull, this stop helps. You’ll get advice about how to position your camera so the surface shows depth, and how to avoid overexposing highlights on pale stone.
It’s also a useful place to practice composition with foreground elements. Even in a wide area, you can build a more interesting image by using nearby edges or columns as framing.


Stop 4: Swedish Cottage Marionette Theatre for Storybook Character
Then you shift tone. Swedish Cottage Marionette Theatre is the kind of place that instantly changes your photo style because it looks like a tiny world of its own.
This is a strong stop for:
- photographing with a “center subject” approach
- finding clean backgrounds (storybook buildings can get messy if you don’t control your angle)
- using the architecture to create a narrative frame
It also helps to think about your camera’s focus behavior here. If you want the building sharp and the surroundings soft, you’ll learn what to do with focus and exposure. If you want everything crisp, you’ll practice the other direction too.
And yes, this kind of stop is fun. It’s not only about technically perfect shots. It’s also about getting images that feel like you visited a real place with character.
Stop 5: Naumburg Bandshell for Stage-Like Framing
Naumburg Bandshell gives you a different kind of photography challenge: structure, performance-style framing, and a sense of space.
Even when there’s no event happening, the bandshell can look like it’s ready to host one. That means your camera can capture it like a stage set, with the seating area and architectural lines creating visual direction.
This is a good moment to practice:
- wide-to-medium composition choices
- keeping verticals straight (or intentionally angled if that’s your style)
- balancing subject size so the bandshell doesn’t look swallowed by the park
If you’re learning camera controls, this stop is also useful for testing how your settings handle mixed lighting. Parks often have bright sky areas plus shaded structures. A guide can help you avoid the classic mistake: sky blown out while shadows stay too dark.
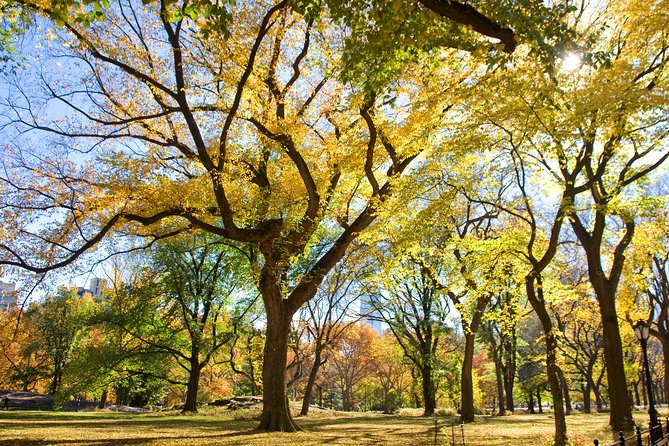
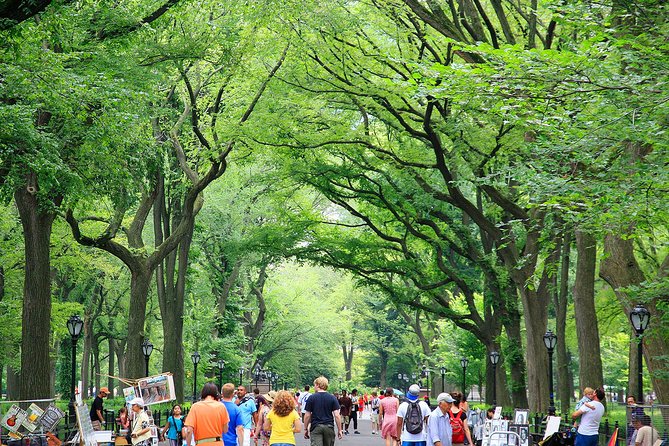
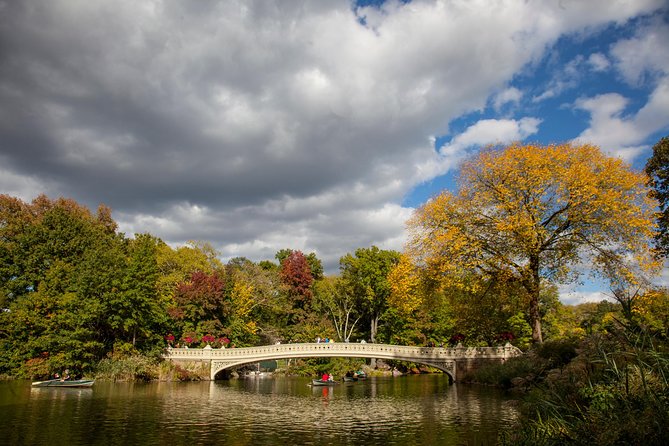
Stop 6: Central Park as a Practice Loop
Stop 6 is simply Central Park. That’s where the workshop logic really clicks.
After you’ve seen several iconic frames, you have enough “pattern recognition” to start working on your own. This stop is your chance to apply what you learned without being stuck on one monument.
Think of it as a practice loop. You can try:
- composing from a different angle than you did earlier
- photographing a smaller detail instead of always aiming for the biggest landmark
- adjusting your camera settings and comparing results
I like this portion because it builds confidence. By now, you’ve got ideas for what makes a strong photo in Central Park. Now you start making choices, not just following directions.
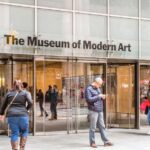
Stop 7 and 8: The Met and the American Museum of Natural History as Photo Backdrops
This tour places you near two huge institutions on the park’s edges. You’ll spend time at the Metropolitan Museum of Art and the American Museum of Natural History areas as part of the route.
The useful thing here is what these stops represent: you’re showing how Central Park can connect to the city’s grand architecture. Even if you don’t go inside (the tour data doesn’t state museum entry), the exteriors and nearby streets still offer strong photo composition opportunities.
What these museum-adjacent stops help you learn:
- how to frame large buildings without losing them to perspective
- how to keep your subject readable in a wide city setting
- how to combine park greenery with urban stone and steps
If you’ve ever taken a photo near big buildings and felt like it turned into “background noise,” this helps you tighten the shot. A local photographer can suggest where to stand so the building becomes a clean backdrop instead of a confusing one.
Price and Value: What $100 Buys You in Real Skills
At $100 per person, you’re not paying for an all-day itinerary or a bus ride. You’re paying for something more useful: a professional local photographer guiding your learning process for about 2 hours 30 minutes.
What’s included:
- a professional LOCAL photographer guide
- local taxes
What’s not included:
- hotel pickup/drop-off
- transportation to/from attractions
So the value question is simple. If you’re the kind of traveler who wants better results from your photos, this cost can make sense fast. You’re paying to compress practice time. Instead of spending hours wandering, you’re moving through a sequence of strong subjects with instruction built in.
Also, the small group size (max 8) supports that price. If you’ve ever been in a large tour where the guide can’t help you one-on-one, you’ll appreciate the workshop structure here. More individual attention usually means fewer missed tips, and that directly shows in your shots.
One more practical point: this is booked about 28 days in advance on average. If your dates are firm, don’t wait until the last moment.
Practical Tips So Your Photos Look Like You Tried
You can get a lot out of this tour just by showing up ready to work. Here’s what I’d do before you go:
- Bring your own camera (and its charger or power bank). The workshop is designed around your equipment.
- If you use a phone, make sure you know how to access the camera settings you like. The session is still about technique.
- Wear comfortable shoes. You’ll move between multiple stops and spend time positioning yourself.
Once you’re on the tour, focus less on getting “the perfect one” and more on getting a strong series. The workshop format is perfect for comparisons. Try one shot with your first idea, then adjust based on what your guide suggests.
And don’t ignore the guide’s viewpoint on angles. With iconic subjects, most people stand in the obvious spot. Better photos usually come from a slight shift: a few steps left, a different height, a cleaner background.
Who Should Book This Central Park Photography Workshop
This is a great fit if:
- you want instruction that helps you use your camera features more confidently
- you prefer small groups and real coaching over a big lecture or a fast walk
- you’re visiting Central Park and want photo-focused planning instead of winging it
- you’re traveling with a teen or beginner who benefits from hands-on teaching (the instruction style has shown it can work well for a 15-year-old)
You might consider skipping if:
- you only want a quick sightseeing stroll and don’t care about learning photo techniques
- you strongly need hotel pickup or a vehicle-based route (this one expects you to handle getting to the meeting point)
Should You Book It?
If you care about taking better photos and you like the idea of learning in the real spaces where you’ll shoot, I’d book this. The biggest strength is the workshop model: professional local photography coaching paired with a sequence of Central Park subjects that teach you composition, exposure, and focus choices in context.
The only real watch-out is logistics. Plan to meet at Bethesda Terrace and arrange your own transportation. If that’s easy for you, the experience feels like a smart use of a couple hours, especially because you get to practice on multiple iconic locations rather than learning in theory and hoping it sticks.
If you want to leave Central Park with images that look more intentional, this is the kind of tour that helps you do exactly that.
FAQ
Where is the meeting point for the Central Park Photography Tour?
You start at Bethesda Terrace, New York, NY 10024, USA. The tour ends back at the same meeting point.
How long is the tour?
The experience runs about 2 hours 30 minutes.
What’s the group size limit?
This activity has a maximum of 8 travelers, which keeps it more personal.
Do I need my own camera?
Yes. The workshop focuses on learning how to take the best possible photos using your own camera.
Is hotel pickup included?
No. Hotel pickup and drop-off are not included, and transportation to/from attractions is also not included.
What if I’m traveling with children or need service animals?
Children must be accompanied by an adult. Service animals are allowed.
Can I cancel for a full refund?
Yes. You can cancel up to 24 hours in advance for a full refund. If you cancel less than 24 hours before the start time, the payment is not refunded.